Introduction: Bubble Wand Building: an Easy Makerspace Activity for a Summer STEAM Camp


How many different ways can I make a bubble?
This is a mini makerspace-esque activity that can easily be done with little money and low prep. It's appropriate for a range of ages, and even adults can find this enjoyable. Even though this is perfect for a summer camp, it can also be a fun activity at a school or community event!
You can make this bubble wand activity super simple for 6 year olds and just use chenille stems, or make it more advanced for middle-schoolers to design and 3D print wands. This actual Instructable is well suited for 7-11 year olds, but is easily adapted for younger or older children. It can also make a fun activity at a school or community event!
This maker activity is meant to be collaborative and open-ended for children to explore all the ways in which they can make a bubble. The challenge question to present to children to explore is: "How many different ways can I make a bubble?"
Supplies
Bubble Solution Supplies
- Water (Distilled is best, but I use tap water more times than not, and it works. I used tap water for the bubble solution shown in the photos!)
- Corn Syrup (or glycerine)
- Corn Starch
- Baking Powder
- Dish Soap (I used Dawn Original)
- Container for Bubbles (I stored my solution in a big bucket, and poured it into a plastic kiddie pool to make the solution easy to access for a bunch of kids.)
Ideas for Bubble Wand Materials
- Straws
- String (Cotton twine or yarn)
- Chenille Stems (You know, pipe cleaners)
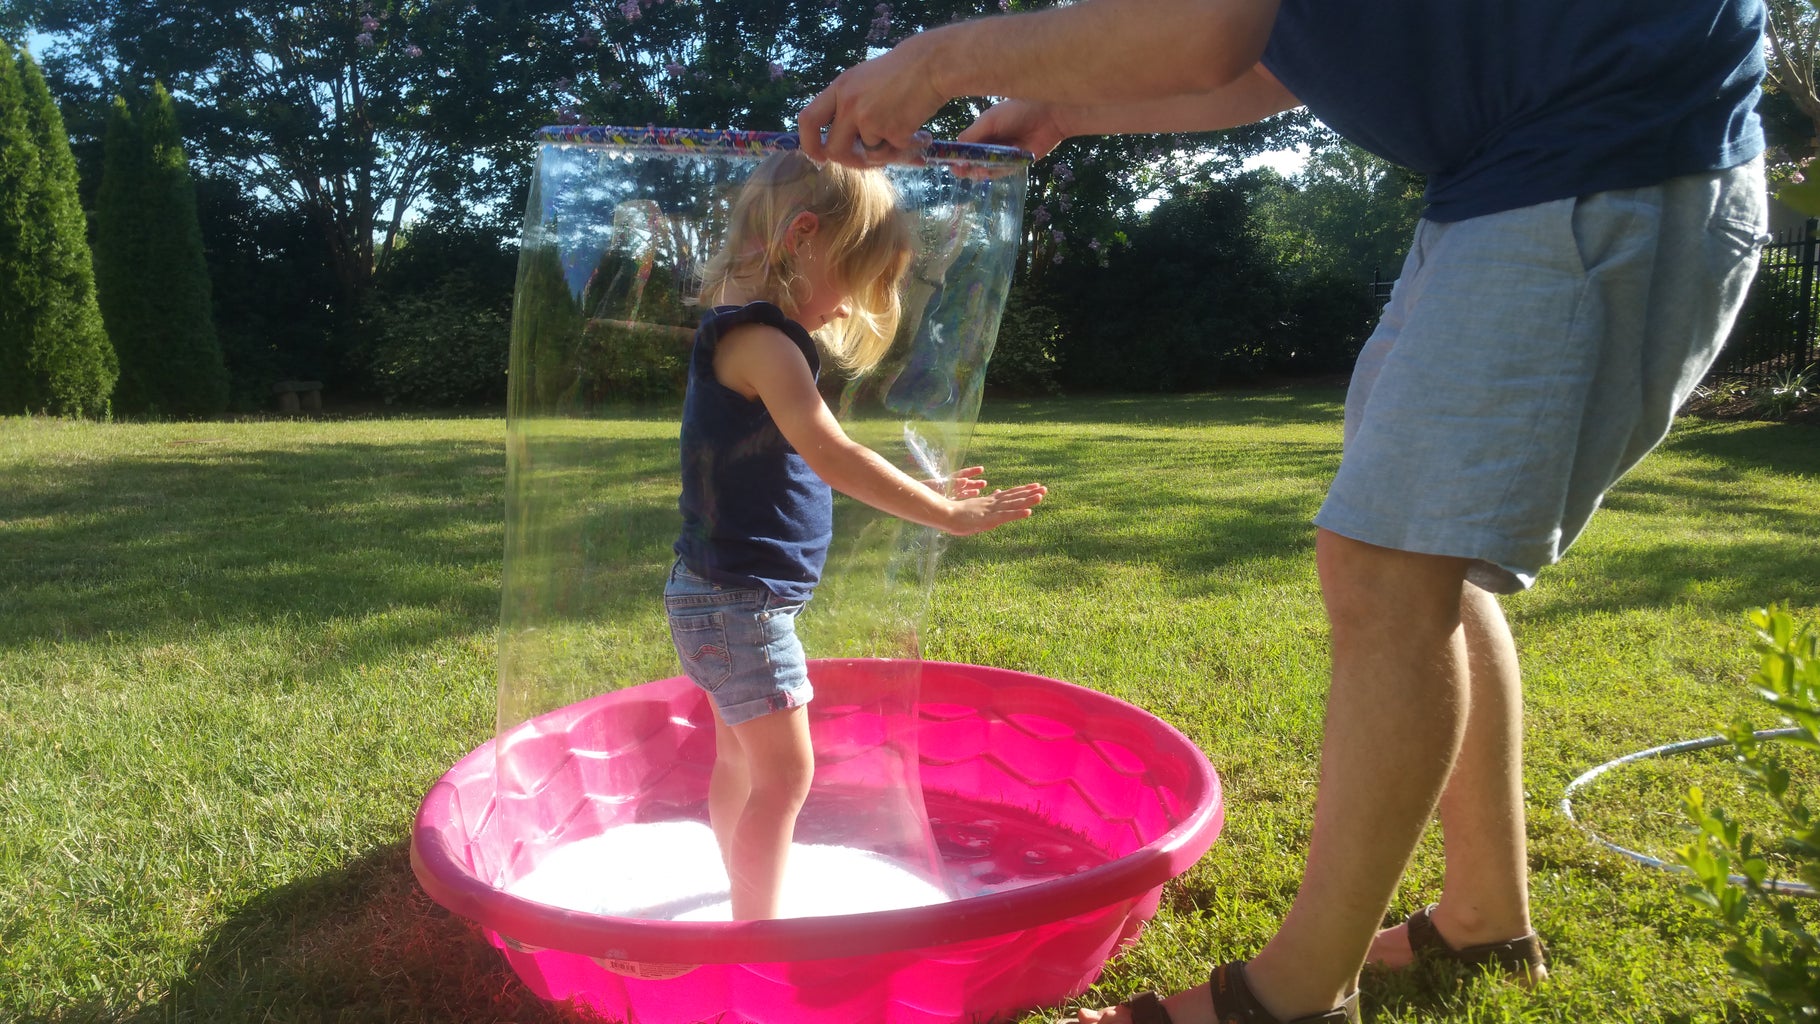
- Hula Hoop (If you want to put kids in a bubble!)
- Basically, you can use anything you have on hand that you think can be used to bubble wands! RAID the recycle bin to see what you can find! (We also used mesh fabric from an old rag and clean, plastic drink containers.)
Maker Supplies
- Scissors
- Tape (Clear cellophane like Scotch tape works well)
Note: Almost everything used for this activity can be found at a dollar store!
Step 1: Make Your Bubble Solution.

There are numerous bubble recipes that are suitable for this activity. This is what I used because I had all these materials on hand. This is the ACTUAL recipe I used to make the bubbles shown in this Instructable!
Big Bubble Recipe:
- 20 cups water
- 2 cups of dish detergent
- 2 cups of corn starch
- 4 tbsp baking powder
- 4 tbsp corn syrup
I like to use warm water because other things dissolve in it better. I mix the corn starch and baking powder in first. The corn starch in particular will not stay fully dissolved and that's okay. Just do your best to stir it up. Next add the corn syrup. Finally add the dish detergent and stir slowly. It's easy for things to bubble out of control, so take it easy.
Concoct this recipe the night before so it has a chance to sit and stew. I've used freshly mixed bubble mixtures before, but in my experience the bubbles have always been better the next day.
A lot of the materials, especially the corn starch and baking powder will settle at the bottom. Be sure to stir it up gently before using. I used this same batch over the course of many days and noticed it was hard to completely form bubbles (i.e. get them to close) unless I stirred the mixture. The corn starch and baking soda make a difference!
Again, this is not the "best" big bubble recipe but it does work. If you want to go all out and purchase some specialty ingredients, check out this recipe that uses J-lube or this recipe that uses Xantham Gum. If you want a "professional" mix, you can purchase a pre-made mix designed specifically to make big bubbles. I highly encourage you make your own mix at least once though!
Step 2: Make Different Bubble Wands.


Present the maker challenge to the kiddos: How many different ways can you make a bubble?
Have materials and supplies ready for the children to use. Depending on the age range, help with cutting and taping as needed.
Don't give answers or solve problems, this is the child's job during this challenge! You can show pictures or offer suggestions if children become stuck. Let children use their imagination to create their own bubble wands!
My favorite wand is a classic design that we recreated using straws, cotton twine, chenille stems, and a ROCK! The instructions for this particular wand are included in the photo. The first iteration of this design just used straws, which ended up being too weak. We had to add reinforcement inside the straw with a wooden bamboo skewer. Be careful with the pointy end! Two sticks, pencils, or wooden dowels would also work for this design! Encourage children to use the design thinking process, including ideate, prototype, and test.
As the children are working, encourage them come up with their own challenges, as well as present new challenges to keep them motivated. For example you can ask them, CAN YOU:
- Make a square bubble?
- Blow a bubble inside another bubble?
- Fit a person inside a bubble?
- Make a very, very tiny bubble?
- Make a lot of bubbles with just one blow?
- Find household items that can make bubbles? (This is how we ended up using the hula hoop! We also used a strainer from the kitchen and the bubbles it made were more like a bubble foam!)
- Put your hand through a bubble?
- Catch a bubble?
- Make bubbles bounce?
- Design a wand so you can dip less? (For example, one way involves adding yarn or cotton twine around the bubble rim helps add saturation so you don't have to dip as much!)
- Look through a bubble? What do you see?
If you come up with other challenge questions, please share in the comments!
Other Wand Ideas from Instructables:
- Bend wire.
- Add faces.
- Make your own hulu hoop wands from scratch (Even better, you can also use them as hula hoops!)
- Create a one way valve to blow giant bubbles.
- Go hi tech and 3d print some wands like here and here or create a bubble machine!
Step 3: Blow Some (okay, Lots!) of Bubbles!

First and foremost, consider SAFETY! From experience with working with kids, here are some cautions:
- If bubble solution is on your hand, do NOT TOUCH YOUR FACE, especially your eyes! Tell children this rule before working with the bubble solution. Rinse immediately with clean water if bubble solution gets into someone's eye. I have found that having a bucket of plain water and a towel helps prevent this from happening. This way children can rinse and dry their hands easily as needed.
- Do not taste or eat bubble solution.
- Bubble solution is slippery! If children are actually STANDING in a bubble pool is is VERY SLIPPERY! Use caution so no one slips! Move slow, give helping hands, and wash off bubbly feet immediately after getting out of the bubble pool.
Weather conditions can make blowing bubbles easier or harder. A full sun day isn't ideal, but can work. A cloudy, overcast day is best.
Other bubble blowing ideas to bump it up a notch:
- Add some watercolor paint and make bubble art!
- Add food coloring to the bubble mixture to create colored bubbles.
- Unless you are an overnight camp or at home, you probably aren't blowing bubbles at night BUT IF YOU CAN: Add glow paint to the bubble mixture OR tonic water (that has quinine) and add an UV light for an amazing bubble show at night!
Runner Up in the
DIY Summer Camp Contest


