Introduction: Coding With the Turtle

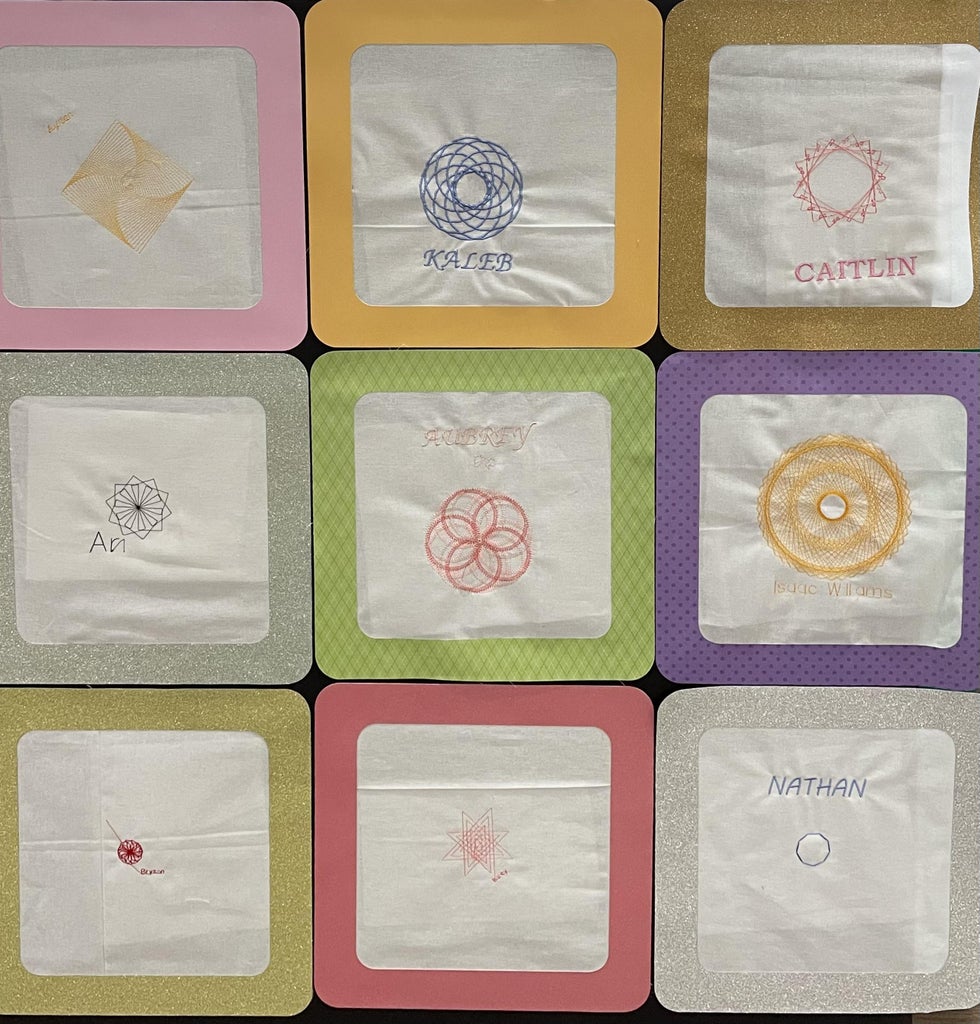
My students created a series of quilt pattern blocks through coding in Turtle Stitch. Students at Winfield Middle School learn to write code to create an embroidered quilt block pattern they create in writing code in Turtle Stitch. Students can also use the same code to 3D print their pattern in Codeblocks in Tinkercad.
Supplies
Embroidering:
Students need a laptop
Turtlestitch - https://www.turtlestitch.org/
Embroidery machine - We use a Babylock Flare but any embroidery machine that can accept files from Turtle Stitch files can be used
Cricut machine - Used to make the frames around the block panel
Cotton material - We used Moda
Scissors
Rotary Cutter & Mat - We used this to cut the fabric into 10 x 10 panels. We could have used smaller squares
Stabilizer
3D printing:
3D printer
PLA filament or filament of your choice
Vinyl cutting:
Vinyl cutting machine such as a Cricut
Vinyl of your choice - We use permanent vinyl and student select the colors they would like to use
Cricut Mat
Step 1: Learning Objectives
Students will be able to give directions in a logical and linear method
Students will be able to block code a square shape
Students will be able to use specialized blocks to create a complex design
Students will be able to code their name in the design
Students will be able to code their designs in several different platforms
Students will be able to utilize TurtleStitch to embroider, Tinkercad's Codeblocks to 3d print, and Cricut Design Space to cut a vinyl sticker.
Students will be able to name their file and save their file
Step 2: Standards
ISTE Student standards:
1.3.b Evaluate Information
Students evaluate the accuracy, perspective, credibility and relevance of information, media, data or other resources.
1.4.a Design Process
Students know and use a deliberate design process for generating ideas, testing theories, creating innovative artifacts or solving authentic problems.
1.4.d Open-Ended Problems
Students exhibit a tolerance for ambiguity, perseverance and the capacity to work with open-ended problems
1.5.c Decompose Problems
Students break problems into component parts, extract key information and develop descriptive models to understand complex systems or facilitate problem-solving.
1.5.d Algorithmic Thinking
Students understand how automation works and use algorithmic thinking to develop a sequence of steps to create and test automated solutions.
1.6.b Original and Remixed Works
Students create original works or responsibly repurpose or remix digital resources into new creations.
Step 3: Grading Rubric
The grading rubric has been modified based on a rubric used from Cal State Long Beach
I also use step completion as an assessment and project completion as an assessment.

Step 4: Let's Start Coding
Teachers:
Great tutorials for you to watch to get familiar with TurtleStitch:
https://www.turtlestitch.org/page/tutorials
Students to go http://www.turtlestitch.org and create an account. Teachers do not have access to student account information. As the teacher I require students to use the same pattern for username and passcode for every account for easier management.
Students begin learning to code by giving directions for a classmate to walk in a square pattern. Discussion about logical and linear directions take place. Students continue to give directions to the walker until the directions are in order to have the student walk in a square shape.
Students and teacher discuss Turtle Stitch page lay out and resources.
Students and teacher discuss blocks available in TurtleStitch design pallet.
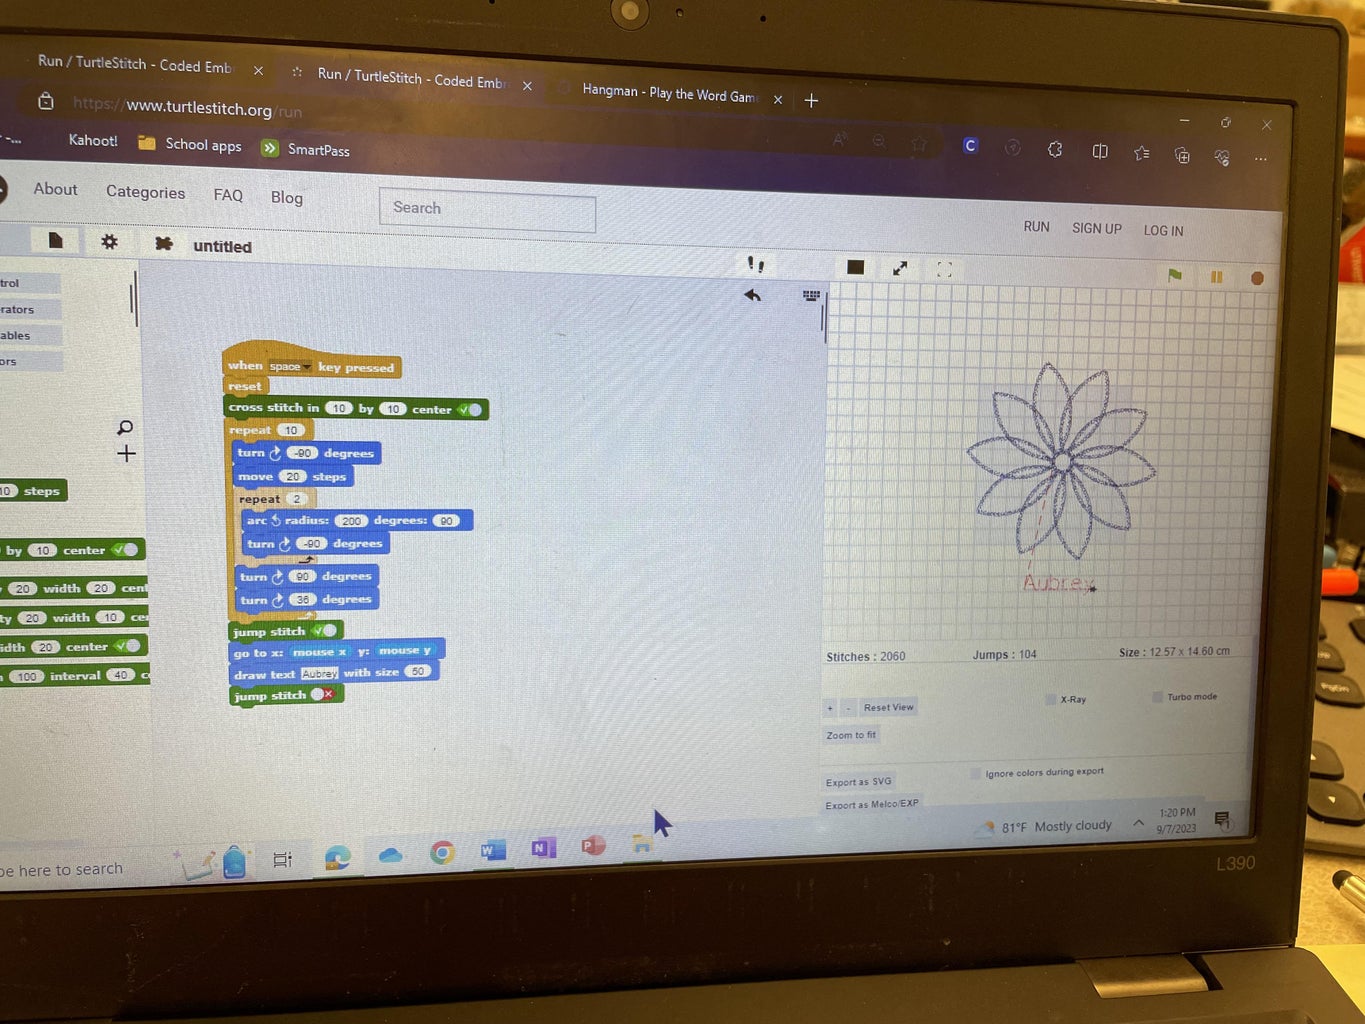
Teacher demonstrates programming a square. Each code starts with "When clicked" block. (See Square demonstration file). I have students also use the square code to add embroidery blocks and see how those embroidery blocks impact their design.
Next demonstrate adding turns, using different degrees of the turn, repeats, and the use of stacks and connecting the stacks to create different designs.
Students are given the task of creating a design through the block coding. The design must also contain their name written in code. (See Square demonstration page with name file)
After students create a few designs, students will be shown library of created code in TurtleStitch and Turtle Art to remix with their designs.
Teacher should evaluate code and design with student.
When teacher and student are satisfied with their design, the design should be name with the student name to both computer and cloud. The design should then be exported in the file format your embroidery machine uses to a USB drive to be taken to your embroidery machine to have stitched out.

Step 5: Stitching Out Student Designs


Place USB drive in the embroidery machine. Each machine will have their own process.
Set safety protocols for the use of fabric scissors and rotary cutters. Demonstrate how to use both tools to cut a 10 inch by 10 inch square of fabric. Each student cuts out 1 10 inch by 10 inch fabric square.
Demonstrate cutting 2 pieces of 10 inch by 10 inch fabric stabilizer. Each student will cut out 2 10 inch by 10 inch pieces of fabric stabilizer
Demonstrate how to place both pieces of stabilizer on the bottom hoop and then adding the 1 fabric 10 inch by 10 inch square of fabric and then placing the inner hoop inside the larger hoop and tightening. Each student will hoop their materials.
Load your hoop, pull up your student's file, and let the machine embroider the design.
After the machine finishes the design, you may sew the blocks together to make a basic style of quilt top or use a Cricut machine to cut frames to put around the squares and do a quilt style wall display
Step 6: Extension: Vinyl Cutter

If you do not have an embroidery machine, you may also use written block code to cut permanent vinyl stickers with a Cricut machine or other vinyl cutter. For this students would need to use a program such as TurtleBlocks:
https://turtle.sugarlabs.org/
Students may use the same type of blocks to create their design.
Students will need to save their file as a .png file type
This file will then be brought into Cricut Design Space and cut.
Step 7: Extension: Tinkercad CodeBlocks
Students may also use Tinkercad Codeblocks to take their code written in TurtleStitch and use that code to create a 3d printed representation of their design.

Participated in the
Project-Based Learning Contest


